
Create a form
- Go to Helpdesk > Forms and click "Add form".
- Give it a Name. The Slug is set when you create the form and cannot be changed afterwards.
- Set the Heading, Intro text, Submit button label and Success message.
- Choose the options below.
- Click "Save form".
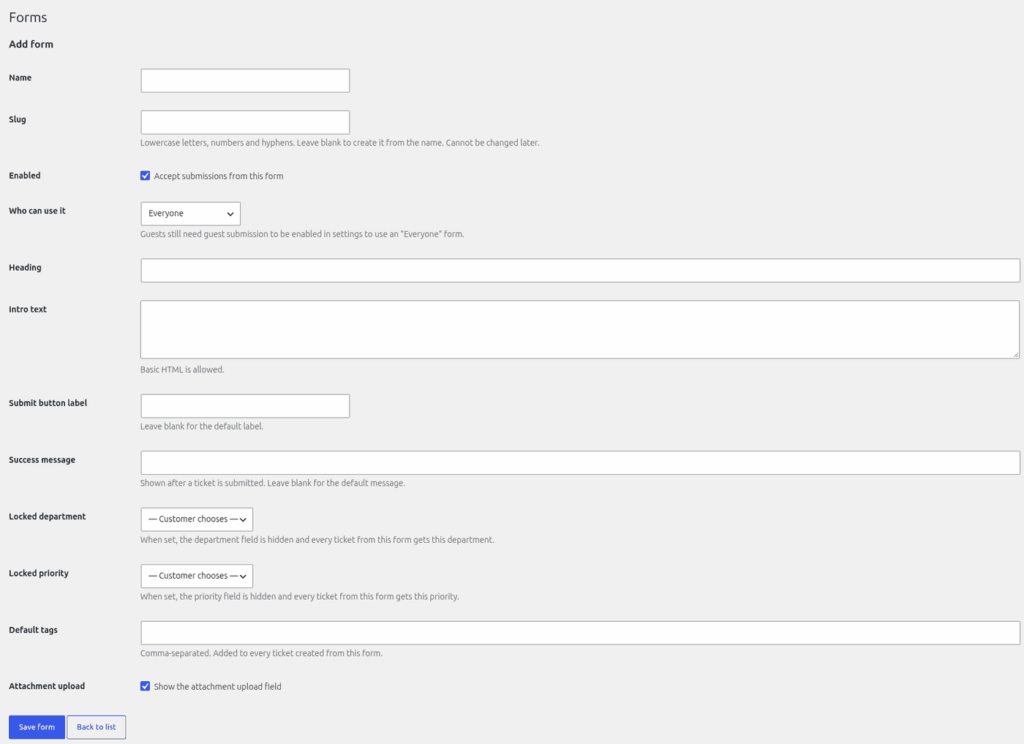
Options
| Option | What it does |
|---|---|
| Locked department / Locked priority | Every ticket from this form goes to that department and priority. The server enforces it, so it cannot be changed from the browser. The lock only applies while that department or priority still exists. |
| Default tags | Tags added to every ticket from the form. Up to 20 tags of 50 characters. |
| Attachment upload | "Show the attachment upload field" on or off. |
| Who can use it | "Everyone" or "Logged-in users only". "Everyone" still needs guest submission turned on in Helpdesk > Settings for visitors who are not logged in. See "Allowing guest tickets". |
| Enabled | "Accept submissions from this form". Untick it, or use the Enable/Disable link in the list, to turn the form off without deleting it. A disabled form rejects submissions, and admins see a notice on it. |
You can have up to 25 forms.
Put it on a page
Use the form's slug in the shortcode: .
Good to know
- A form is a way to preset wording and routing. It is not an access barrier. A submission that does not name a form goes to the default form.
- A ticket remembers which form it came from. Agents see a "Form" line on the ticket.
- A form can send tickets to a team through its locked department. See "Auto-assignment, departments covered and agent teams".
Still stuck? Open a ticket on the support page on ABC and a real person will help.
Was this article helpful?